$585.48
Add to Cart
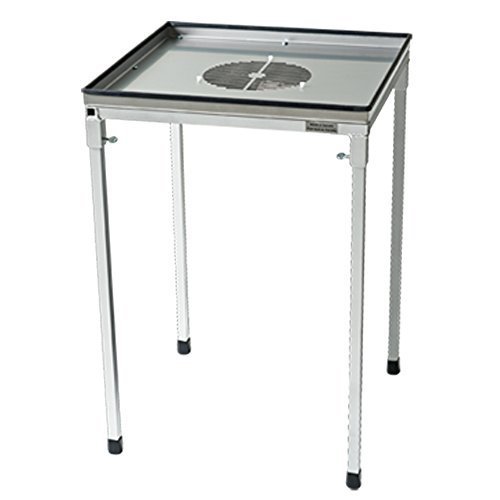
TRIMPRO TRIMBOX WORKSTATION - TABLE ONLY
More than 10 available
Details
Shipping: Australia: free (more destinations)
Condition: Brand new
*The store has not been updated recently. You may want to contact the merchant to confirm the availability of the product.
Assembling the Trimbox Workstation is a quick and easy process. Use the four hand-tightenable butterfly screws supplied with the kit to secure each of the legs in place. Before dealing with the Trimbox unit itself, it should be noted that the hub (which sits on the drive shaft) and the Trimbox blades / flaps should never be separated. If making adjustments, always use the blocking screw located on the side of the hub to remove the hub and blades as a combined unit; do not use the screw located on the top of the hub that sits in the centre of the blades and flaps. The Trimbox is supplied with its own pre-attached grate, which is black in colour. When using the Trimbox in conjunction with the Trimbox Workstation, this grate must be removed, so that the Trimbox can be fitted to the stainless steel grate of the Workstation. Remove the three plastic nuts from the original black grate by twisting them anti-clockwise and keep them in a safe place. The Trimbox can then be installed under the Trimbox Workstation's grate by pushing the three threaded stems on the top of the Trimbox through the three corresponding holes on the Trimbox Workstation and screwing the nuts previously removed back into place. The collecting bag should then be fixed to the underside of the Trimbox. Open the Velcro fastener up and gently slide the bag up to the top of the Trimbox, so that it sits above the 4 black, rubber-coated bolts. That way, when you secure it in place using the Velcro fixing, the rubber-coated bolts will prevent the bag from sliding down.
You may also be interested in:
-
$2,148.86
")
-
$43.63

-
$563.80

-
$450.48

-
$2,649.71

-
$2,325.14

-
$846.40

-
$1,694.18

-
$352.49

-
$345.55


